Unlocking the Magic of Homemade Gravy: Why It's a Kitchen Essential
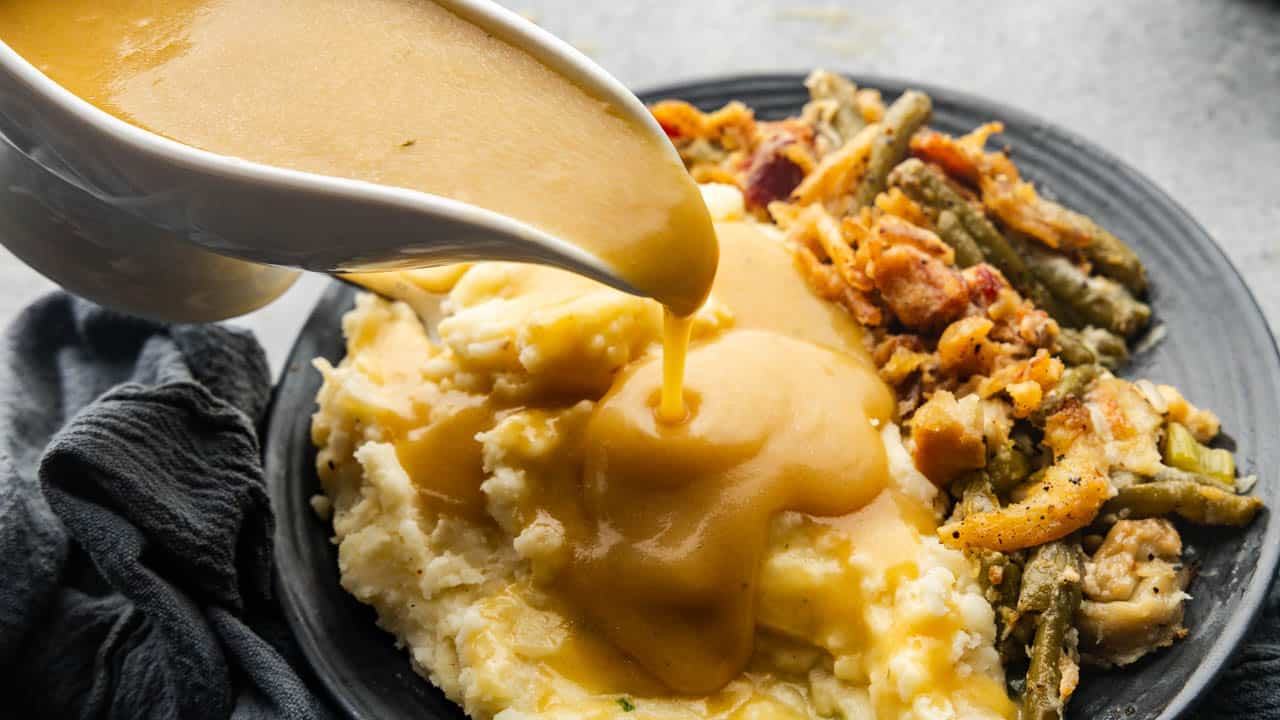
There's an undeniable allure to perfectly crafted homemade gravy. It's the silky, savory finish that transforms a simple meal into a memorable feast, coating everything from fluffy mashed potatoes to succulent roasted meats with unparalleled flavor. Many home cooks shy away from making gravy from scratch, intimidated by perceived complexity. However, mastering the art of homemade gravy is not only surprisingly easy but also incredibly rewarding, requiring minimal ingredients and just about 10 minutes of your time. Once you experience the depth of flavor and customizable versatility, you'll likely never reach for a store-bought packet again.
Homemade gravy is a fundamental skill for any culinary enthusiast, offering endless possibilities. Whether you're accompanying a festive holiday turkey, a comforting pot roast, or even whipping up a rich sausage gravy for breakfast biscuits, the principles remain the same. This comprehensive guide will walk you through everything you need to know about how to make gravy, from utilizing flavorful broths and precious pan drippings to mastering gluten-free options, ensuring you can create a delicious batch every single time.
The Fundamental Elements: Broths, Fats, and Thickeners
At its heart, gravy is a simple emulsification of fat, a thickener, and a flavorful liquid. Understanding each component is key to building your perfect gravy.
Choosing Your Liquid Gold: Broths, Stocks, and Drippings
The liquid base is where much of your gravy's character originates. You have several fantastic options:
- Broths & Stocks: Chicken, beef, turkey, or even vegetable broth (for a vegetarian option) all make excellent bases. For the best flavor, opt for low-sodium varieties or homemade stocks, allowing you to control the seasoning precisely. These provide a clean canvas for your gravy.
- Pan Drippings: Often called 'liquid gold,' pan drippings are the flavorful juices, fat, and browned bits (fond) left in the bottom of a roasting pan after cooking meat. They are incredibly rich and infuse your gravy with the specific flavors of your roast. To use them, first, you'll want to carefully separate the fat from the liquid. A simple trick is to pour the drippings into a fat separator or through a fine-mesh strainer into a glass measuring cup and allow the fat to rise to the top, then spoon it off or pour the defatted liquid from the bottom. The rich liquid that remains is packed with umami.
The Foundation of Flavor: Selecting Your Fat
Fat is not just a medium for your thickener; it's a critical flavor component. The best fats for gravy are:
- Butter: A classic choice, butter imparts a rich, creamy flavor and a beautiful golden hue. Unsalted butter allows you more control over the final saltiness.
- Bacon Fat: For a smoky, incredibly savory gravy (perfect for sausage gravy!), rendered bacon fat is a superior choice that adds significant depth.
- Pan Drippings Fat: If you're using pan drippings, the rendered fat from your roast is an excellent, complementary choice, carrying over the meat's flavor profile.
- Neutral Oils: Vegetable oil, coconut oil, or margarine can also be used if you prefer a less pronounced fat flavor or need a dairy-free option. While they work, they won't contribute the same depth as butter or bacon fat.
Mastering the Thickeners: Flour vs. Cornstarch
The choice of thickener dictates the texture and appearance of your gravy.
- All-Purpose Flour: The traditional choice, flour is used to create a "roux." A roux is an equal parts (by weight) or 1:2 ratio (fat to flour by volume) cooked mixture of fat and flour. As flour cooks in fat, its starch molecules swell, effectively thickening liquids. Flour-based gravies tend to be opaque, with a slightly earthy, robust flavor. The longer you cook the roux, the darker it becomes (white, blonde, brown), developing nuttier flavors and a slightly less powerful thickening ability. For a deeper dive into the science behind creating the perfect base, exploring roux techniques and innovative roasting pan methods can elevate your game even further.
- Cornstarch: A fantastic gluten-free alternative, cornstarch creates a gravy that is typically clearer and shinier than one thickened with flour. It's also a more powerful thickener, so you'll only need about half the amount of cornstarch compared to flour. Cornstarch must be mixed with a cold liquid (water, broth, or milk) to form a "slurry" before being added to hot liquids, preventing lumps and ensuring even thickening. Adding cornstarch directly to hot liquid will cause it to clump.
Step-by-Step: How to Make Gravy from Scratch
While there are variations, the core process for making gravy is consistent.
The Classic Roux Method (General Purpose)
This method is your go-to for making gravy with any type of broth or even a combination of broth and drippings.
- Prepare Your Ingredients: Have your fat (e.g., butter) measured, your flour ready, and your chosen liquid (broth or strained drippings) warmed. Warming the liquid helps prevent lumps and speeds up the process.
- Make the Roux: In a saucepan over medium heat, melt your chosen fat. Once melted and shimmering (about 1/4 cup fat for approximately 2 cups of liquid), gradually whisk in the all-purpose flour (about 1/4 cup for 2 cups of liquid). Continue whisking constantly for 1-2 minutes until the mixture forms a smooth paste (the roux). For a lighter gravy, cook briefly until pale yellow (a blonde roux). For more robust flavor, cook a bit longer until a light golden brown.
- Whisk in Liquid: Slowly pour in the warm liquid (about 2 cups), whisking vigorously and continuously to prevent lumps. Start with a small amount to create a smooth paste, then gradually add the rest.
- Simmer to Thicken: Bring the mixture to a gentle simmer, still whisking occasionally. The gravy will thicken as it heats. Allow it to simmer for 2-5 minutes until it reaches your desired consistency.
- Season and Serve: Taste and season generously with salt and freshly ground black pepper. You can also add a touch of herbs like sage or thyme, a dash of Worcestershire sauce, or a splash of wine for extra depth.
Gravy Perfection with Pan Drippings: The Roasting Pan Method
Making gravy directly in the roasting pan immediately after removing your roast is an exceptional way to capture every ounce of flavor. If you're short on time but still crave that homemade goodness, mastering a quick, 10-minute gravy is entirely achievable, often relying on the efficiency of this method.
- Collect Drippings: Once your roast is removed from the pan, carefully pour the pan drippings through a fine-mesh strainer into a heatproof measuring cup. This removes any large pieces of gristle or herbs. Skim off excess fat from the surface, reserving some if you plan to make a roux in the pan.
- Deglaze the Pan (Optional but Recommended): Place the roasting pan on your stovetop over medium heat (straddle two burners if necessary). Add a splash of broth or wine and scrape up any browned bits (fond) stuck to the bottom of the pan with a wooden spoon. This "fond" is pure flavor. Add this deglazing liquid to your collected drippings.
- Make Gravy in the Pan:
- Roux Method: If you reserved some fat, add 1/4 cup of the reserved fat back to the roasting pan. Heat it, then whisk in 1/4 cup flour to create a roux, cooking for 1-2 minutes. Gradually whisk in your defatted pan drippings (and supplemental broth if needed to reach 2 cups liquid) and simmer, whisking, until thickened.
- Slurry Method (Quicker): For approximately 2 cups of drippings (supplement with broth if needed), measure out 2 tablespoons of cornstarch. In a small bowl, whisk the cornstarch with 1/4 cup cold water or broth until smooth to create a slurry. Bring your defatted pan drippings to a simmer directly in the pan. Slowly whisk in the cornstarch slurry, bit by bit, until the gravy reaches your desired thickness. Simmer for 1 minute to cook out any starchy taste.
- Season: Taste and adjust seasoning as needed.
Gluten-Free Gravy & Creamy Variations: Catering to Every Palate
Effortless Gluten-Free Gravy with Cornstarch
Making gluten-free gravy is remarkably straightforward, simply by swapping flour for cornstarch. Remember the golden rule: cornstarch is a potent thickener, so you'll only need about half the amount of flour.
- Ratio: If a recipe calls for 1/4 cup of flour, replace it with 2 tablespoons of cornstarch for approximately 2 cups of liquid.
- Preparation: Always create a slurry first. Whisk cornstarch thoroughly with an equal amount of cold liquid (water, broth, or milk) until no lumps remain.
- Adding to Hot Liquid: Once your broth or drippings are simmering, gradually whisk in the cornstarch slurry. Stir constantly as the gravy thickens almost immediately. Simmer for just one minute to ensure the raw starchy taste is cooked out. Avoid overcooking cornstarch-thickened gravy, as it can sometimes become "gooey."
Indulgent Creamy Gravies: Beyond the Basics
For gravies that are rich, smooth, and wonderfully comforting, milk is your secret ingredient. Creamy gravies are perfect for country-fried steak, fried pork chops, or the beloved sausage gravy for biscuits.
- Milk as a Base: Instead of, or in addition to, broth, use milk as your primary liquid. Whole milk or half-and-half will yield the creamiest results.
- Sausage Gravy: Brown sausage in a skillet, then use the rendered fat to make a roux (add butter if not enough sausage fat). Whisk in flour, then gradually add milk. Simmer until thick, stirring in the cooked sausage, and season generously with black pepper.
- Creamy Meat Gravy: You can also add a splash of milk or cream to any meat-based gravy for a creamier finish, enriching the texture and mellowing the flavors slightly.
Tips for Gravy Mastery & Troubleshooting Common Issues
- Preventing Lumps: The key to lump-free gravy is to either use warm liquid with a cold roux, or add cold liquid very gradually to a hot roux while whisking vigorously. For cornstarch, always make a smooth slurry with cold liquid first.
- Gravy Too Thin? If using flour, make a small slurry of equal parts softened butter and flour, then whisk it into the simmering gravy. For cornstarch, mix a small amount of cornstarch with cold liquid, then slowly whisk it into the simmering gravy until desired thickness.
- Gravy Too Thick? Simply whisk in a little more warm broth, water, or milk until it reaches your preferred consistency.
- Bland Flavor? A splash of wine, a dash of Worcestershire sauce, a bouillon cube (if salt is needed), fresh herbs, or a touch of mushroom powder can deepen the flavor profile.
- Seasoning: Always taste and adjust seasoning throughout the process. Remember, gravies often benefit from a generous hand with salt and freshly cracked black pepper.
- Storage: Homemade gravy can be stored in an airtight container in the refrigerator for 3-4 days.
- Reheating: Reheat gently on the stovetop over low heat, whisking constantly. If it thickens too much, add a splash of broth or water to thin it out.
Mastering homemade gravy is a rewarding skill that will elevate your cooking and impress your guests. With these techniques and tips, you're well on your way to creating consistently delicious, silky-smooth gravy that perfectly complements any meal. So, grab your whisk, embrace the simple science, and savor the rich, comforting taste of your very own homemade masterpiece!
